21 Age of Heroes: Difference between revisions
| Line 806: | Line 806: | ||
<span style="color:#666;">Position:</span> Unknown | <span style="color:#666;">Position:</span> Unknown | ||
| style="vertical-align:top; text-align:left; padding-left:1em;" | | | style="vertical-align:top; text-align:left; padding-left:1em;" | | ||
30x [[File:1001034.png | 30x [[File:1001034.png]] [https://www.divine-pride.net/database/item/1001034 Snow Flower Magic Stone Extract] (1001034)<br /> | ||
30x [[File:1001035.png | 30x [[File:1001035.png]] [https://www.divine-pride.net/database/item/1001035 Shining Snow Flower Magic Stone Extract] (1001035)<br /> | ||
15x [[File:1001036.png | 15x [[File:1001036.png]] [https://www.divine-pride.net/database/item/1001036 Brilliant Snow Flower Magic Stone Extract] (1001036)<br /> | ||
30x [[File:1001037.png | 30x [[File:1001037.png]] [https://www.divine-pride.net/database/item/1001037 Glacier Extract] (1001037)<br /> | ||
15x [[File:1001250.png | 15x [[File:1001250.png]] [https://www.divine-pride.net/database/item/1001250 Pure Magic Extract] (1001250)<br /> | ||
25x [[File:1001657.png | 25x [[File:1001657.png]] [https://www.divine-pride.net/database/item/1001657 Shining Sunset Magic Stone] (1001657) | ||
| style="vertical-align:top;" | 2,000,000z | | style="vertical-align:top;" | 2,000,000z | ||
| Line 831: | Line 831: | ||
| style="vertical-align:top; text-align:left; padding-left:1em;" | | | style="vertical-align:top; text-align:left; padding-left:1em;" | | ||
30x [[File:1001034.png|20px]] [https://www.divine-pride.net/database/item/1001034 Snow Flower Magic Stone Extract] (1001034)<br /> | 30x [[File:1001034.png|20px]] [https://www.divine-pride.net/database/item/1001034 Snow Flower Magic Stone Extract] (1001034)<br /> | ||
30x [[File:1001035.png | 30x [[File:1001035.png]] [https://www.divine-pride.net/database/item/1001035 Shining Snow Flower Magic Stone Extract] (1001035)<br /> | ||
15x [[File:1001036.png | 15x [[File:1001036.png]] [https://www.divine-pride.net/database/item/1001036 Brilliant Snow Flower Magic Stone Extract] (1001036)<br /> | ||
30x [[File:1001037.png | 30x [[File:1001037.png]] [https://www.divine-pride.net/database/item/1001037 Glacier Extract] (1001037)<br /> | ||
15x [[File:1001250.png|20px]] [https://www.divine-pride.net/database/item/1001250 Pure Magic Extract] (1001250)<br /> | 15x [[File:1001250.png|20px]] [https://www.divine-pride.net/database/item/1001250 Pure Magic Extract] (1001250)<br /> | ||
25x [[File:1001657.png | 25x [[File:1001657.png]] [https://www.divine-pride.net/database/item/1001657 Shining Sunset Magic Stone] (1001657) | ||
| style="vertical-align:top;" | 2,000,000z | | style="vertical-align:top;" | 2,000,000z | ||
|} | |} | ||
Revision as of 22:26, 30 August 2025
21 Age of Heroes
This page contains changes which are not marked for translation.
Main Quest
- (jor_tail 233, 41) you will find Shufapa. He explains that they plan to investigate Scale Island and asks you to come along. The reason is an unusual mana wavelength on the island.
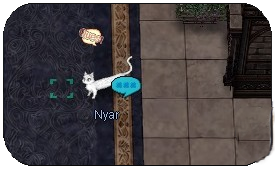
- (jor_crk 137, 137), a dialogue opens, and Nillen confirms that the wavelength is unusual. Lehar spots Nyar on the island, so everyone decides to see what's up with her.
- (jor_crk 107, 112), talk to Nyar. Aurelie, Lehar, and Nillem appear. The mana wavelength comes from a rift that opened, causing dimensional boundaries, time, and parallel dimensions to collapse. Nyar points out that the rift leads to the past, offering a way to deal with Lasgand. Nyar connects the rift to the time when Lasgand gained his power. The dialogue option you pick doesn't affect the outcome.
- You get warped to (jor_crk_p 108, 106). Talk to Nyar again. Lehar and Nillem appear. Nillem confirms you are in the past where the rift opened, during the founding of Rune-Midgarts and when Lasgand inherited his power. A plan is formed to alter the past to stop Lasgand. Lehar spots people, and everyone approaches them as volunteers for the resistance against the Jormungandr Cult.
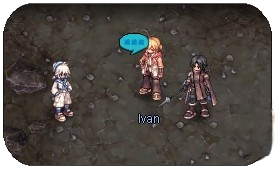
- In (jor_crk_p 104, 95), people who discovered the rift appear. They are against the cult but spot you. Tell them, "We're Adventurers." After confirming you're allies, the stranger introduces himself as Ivan from the Wigner family. Follow him.
- You are warped to a Safe Place at (luna_sf1 258, 147). Talk to Ivan. He explains you're near the cult in the Raised Land, heading to the Gaebolg base, Lunaphoma. Follow the soldier to the commander.
- Talk to the Resistance Soldier in (jor_mbase 38, 152) who introduces you to Lunaphoma. Before going to the headquarters, he needs to report something to the commander and vice-commander. Followers of Freya are complaining and Lehar suggested to listen in to hear what's the fuss.
- Talk to Tris. You hear that the people of Freya complain that the fight against the cult is lead in the name of Odin and they want Freya to be included as well. Tris explains the difficult time and that they didn't forget about the people of Freya, but also mentions that they need more time because the war against the cult is top priority. But the people of Freya are unhappy and decide to leave the resistance.
- Talk to the Resistance Soldier again who introduce us to the captains. After explaining the situation, Tris wants to send you to the Richard Mercenary Group, because people with combat skills are always needed there
- Talk to Tan who got ordered to bring you to the Richard Mercenary Group. He is clearly against us being part of the resistance. Tell him that "We'll go right away.
- Follow the navi (jor_mbase 305, 102) until everyone appears. Tan shows us where the mercenary group's office is and that we need to find a Richard there.
- You have to go to the mercenary group's office, but no one is here. Suddenly you find a mysterious man. Lehar sends you to speak to him.
- Walk into the portal above the NPCs.
- Talk to ???. We tell him that we are here to see the Mercenary King Richard. We also add that Tan sent us to this place. According to the mysterious man, Richard is not here and that we need to go to the Central Barracks where Richard's room is.
- You have to search for Richard's room (jor_mbase 203, 190). Check his room
- Go upstairs and right and enter the second to last portal where Richard room lies. But no ones here, so we check the next door. After a warning a woman appears and asks us what brings us to Richard. We explain that Tan sent us
- You are sent back to the Mercenary Group's Office at (jor_mbase 313, 121).
- When entering the office, a dialogue will start. You hear that Richard is not here. The lady, Valdaris, explains that we need to go through the registration process first.
- Talk to the documents where you find the papers for the applications. You get explained that they are still using the old forms and they are not for applying to only one mercenary group
- Talk to Valdaris to give her your form. After reviewing the forms we get welcomed to the the Richard Mercenary Group
- Talk to Tan, who is talking to Valdaris about us being suspicious. He is still concerned about if we are good or not. Valdaris is taking us to a simple tour around the area
- When leaving the office another dialogue will start where Valdaris tells us that this base was build in a rush.
- Walk a little bit down. You learn that there are supplies stored from the Wigner Merchant Group.
- Laura Valdaris tells us that this an area for temporary visitors.
- At (jor_mbase 245, 128) some kids appear and want to play with their Sister Valdaris. She explains that the children are rescued from the Jormungandr Cult. After explaining everything about the kids she asks us to go to the training groundtheir "Sister Valdaris." She explains they were rescued from the Jormungandr Cult and asks you to go to the training ground.
- Valdaris is waiting for you at (jor_mbase 147, 108). She explains the training grounds and that it is open for everyone. You hear something strange from the soldiers, so Valdaris gets angry and wants to investigate it.
- Go near the soldiers where you see someone getting beaten up so bad that he nearly dies. It's Richard who gets beaten up, so Valdaris decides to bring him back to his room to treat his wounds.
- Return to the center at (jor_mbase 202, 191).
- Go upstairs enter the second to last portal on the right side
- Talk to Valdaris who is REALLY UPSET about the situation. Nerius tells her that Richard wanted to be attacked.
- Talk to Richard who explains that he wants to create books for battle. Getting hit by Nerius was necessary to show proper combat stances which are better shown in real-life examples. Lee should draw the illustration for the book.
- Talk to Lee who instantly shows you the illustration he has drawn. After some talking about the book, you get introduced to Richard. Lee gets ordered to show us the rest while Richard and Valdaris have a talk.
- Leave the room, enter the last portal
- Talk to Lee again. He tells us the full story of how they met Galaxia, where she destroyed nearly the entire mercenary group alone. After clearing the armor, Lee is willing to show us the rest of the base
- Leave the center and walk a little bit left (jor_mbase 168, 195) where Lee explains the rest of the base. Tan will appear and tell us that this should be enough and you should go and see Tris. You will be rewarded with 30x 1001618.png Wigner Merchant Guild Voucher (1001618) and 30 reputation.
- Talk to Tris. He asks us how everything went. After some explaining, he tells us that Alberta needs a wizard and Nillem should join them. Lehar will be sent to the Wigner Merchant Group, who are involved in relief efforts for people who escaped the cult. For us, we need to meet someone first. We meet Heine through a magic Tablet (Insert mobile phone joke here). Learning from Heine, our task will be to go to Alberta and receive the goods Heine sent to the resistance. Heine wishes to get a special Bright Eye from us. It must be from us and a fresh one, so not a single one from the storage. There are 4 dialogs in total and you need to click specific options:
- First Dialogue
- Bearable.
- Second dialogue: Is that person you, Tris?
- Third Dialogue: Enjoy the text.
- Fourth dialogue: Get kill quest 10x Skipskipper (22319) and collect 1x Bright Eye (1001641).
- First Dialogue
- Talk to Walter Sailor (jor_mbase 161, 341) and go to the Raised Land. Here you can do the kill quest.
- To return you can talk to the Hidden Boat on the bottom left of the map (jor_raise2 100, 26)
- Go back to Tris. You will be rewarded with 30x
 Wigner Merchant Guild Voucher (1001618) and 35 reputation.
- You have unlocked: Volunteer Vallen Wok Daily Quest
- You have unlocked: Counselor Wool Daily Quest
- Go to the other Walter Sailor (jor_mbase 333, 148), he will take you to the Alberta.
- Walk up a little bit and talk to Nillem. You watch how Nillem gets overloaded with work from the Sailor. After entering the discussion, the Sailor introduces himself as Megas. He forces you to go to the beach to find work, ignoring your request
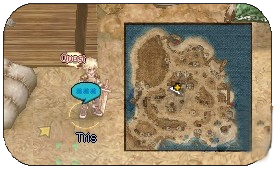
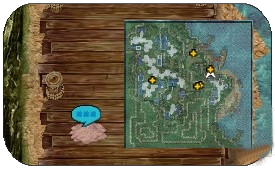
- (jor_albe 227, 117) Walk into the quest sign, Yohan will appear. He assigns you with moving the cargo to specific areas. Those are marked on the map
- Visit Walter Sailor at (jor_albe 146, 224). He explains to you that everyone needs to do those tasks, it's like a ladder where everyone begins the same
- There is another Walter Sailor waiting inside a building (jor_albe 120, 145)
- Enter the building, walk up, and talk to Walter Sailor.
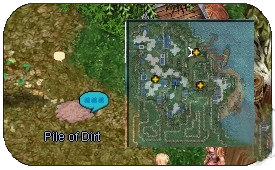
- Go back to Yohan (jor_albe 227, 117). With all the goods coming and going there is dirt in the town. You have to clean up 4 dirt piles
- The 4 dirt pile locations are:
- (jor_albe 205, 132)
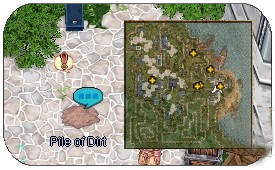
- (jor_albe 189, 166)
- (jor_albe 174, 139)
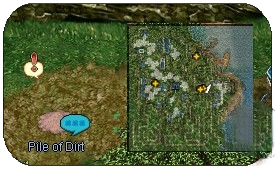
- (jor_albe 143, 210)
- (jor_albe 205, 132)
- Go back to Yohan (jor_albe 227, 117). He will give you the next job in the warehouse you were before.
- Go back to the previous building (jor_albe 120, 145)
- Enter the building and walk down. You will meet Iana Operta. She wants you to deliver 2 letters.
- First letter: Enter the building at (jor_albe 200, 107)
- Talk to Professor Sanguin. He takes the letter and mentions that your name is mentioned in the letter too. After some waiting, he gives you a written reply
- Second letter: Enter the building at (jor_albe 60, 237)
- Talk to Patissier Edel. She introduces herself and asks about your business. Choose the second option (First Option would mean trouble!) and hear her reply
- Go back to Iana (jor_albe 120, 145). Enter the building, walk down and talk to Iana. You bring her both replies and she tells you that those aren't basic trivial errands. You get introduced to Mariastella Walter and start talking about the stories of the ghost ship. We are told that Maria's father, Walter, might be on the ship and we need to gather information about it's location.
- You will be rewarded with 40x Wigner Merchant Guild Voucher (1001618) and 40 reputation.
- Go back to Lunaforma, talk to the Walter Sailor at (jor_albe 194, 200)
- Talk to Ivan at (jor_mbase 240, 277). Ask about the ghost ship. But instead of getting information, you will get assigned to helping with the meal.
- Talk to Lehar in (jor_mbase 214, 306) several times. You decide to help him with the meals for the Wigner groups. Everyone is enjoying Lehar's rice a lot. Lehar mentions that he heard people mention a ghost ship.
- Talk to Ivan at (jor_mbase 193, 287) who tells you how many people saw the ghost ship. He gives you the name of who you should ask first, because he saw most of the stuff happening.
- Talk to Lyriq at (jor_mbase 191, 306), who gets introduced by Lehar. After some small talk he gets more comfy around you and begins to tell you the story of what happened on that day with the ghost ship. We decide to go back to Ivan.
- Talk to Ivan at (jor_mbase 237, 281). He tells us that he wants to join us on the ghost ship mission. But we need to deliver a package to his sister in Alberta first.
- Talk to Walter Sailor (jor_mbase 333, 148), he will take you to Alberta again.
- Enter the building at (jor_albe 100, 238)
- Talk to Lalaila Wigner, who is surprised about Ivan's package. She explains to you that she sends others to look over Ivan. We should take something he left behind and bring it to him.
- Enter the portal at the top and check the dusty box. It contains well maintained knuckles which get cleaned and everything by Lalaila. She confirms that Ivan wanted those knuckles to be thrown away but Lalaila refused. She also gives you a letter for Maria Walter.
- Leave the building and go to the next one at (jor_albe 120, 146)
- Talk to Maristella Walter and give her the letter. She doesn't say anything and just smiles. You will be rewarded with 10x Wigner Merchant Guild Voucher(1001618) and 5 reputation.
- Go back to Lunaforma, talk to the Walter Sailor at (jor_albe 194, 200)
- Talk to Ivan at (jor_mbase 237, 281). He suggests to infiltrate through the north of the Raised Land and to meet there. You will be rewarded with 40x Wigner Merchant Guild Voucher (1001618) and 40 reputation.
- Talk to Walter Sailor (jor_mbase 161, 341) and go to the Raised Land.
- Leave the map through the top portal.
- Walk into the bushes at (jor_raise1 322, 64)
- You will be ported to another map. Talk to Ivan. A plan is made to infiltrate the temple. Why is there a temple and why does it look like it's made by human? This question is asked and the only way to find out is to go inside.
- Unlocked Jormungand Church Temple.
- Enter the dungeon at (jor_raise1 152, 316)
- Enter the safe spot at (jor_tmple1 170, 62)
- Talk to Ivan. Ivan sorts out a plan out to find any humans who are looking to escape. Top priority is gathering information about the ghost ship though, so we go with Tan to gather information.
- Go to the next safe spot at (jor_tmple1 103, 180)
- Talk to the believer. After asking, they can't give any information about the ghost ship. Because of their strong faith Tan decides not to ask about escaping.
- Go to the next safe spot at (jor_tmple1 181, 235)
- Talk to another believer. They are unhappy, but after asking about escaping, they think we want to capture them and bring them to the 2nd floor, where humans get taken away by the guards. Tan suggested to go there for potential information.
- Go to the next safe spot at (jor_tmple1 229, 270)
- Talk to the next believer. You get told to go to the 2nd floor, but you need to be registered by the priests as a believer first. But currently they have disappeared, so Tan suggests to go back to the gathering point.
- Go back to the first safe spot at (jor_tmple1 170, 62)
- Talk to Ivan. Ivan and Yohan came to the same conclusion and without any information. It's said that we need more information about the place first before we can get more.
- Go back to Lunaforma.
- Talk to Tris at (jor_mbase 142, 264) Tris is bit frustrated that we couldn't find any humans who wanted to escape or any information about the ghost ship. But someone will arrive soon with potential inside information, so we will meet him and maybe he can guide us to the second floor! You will be rewarded with 15x Wigner Merchant Guild Voucher (1001618) and 15 reputation.
- Visit the small boat at (jor_mbase 124, 33)
- Talk to Tan at (jor_crk_p 72, 76) The informant, Nadoyo, explains that there is someone who wants to escape from the temple and has every information we need. But to get there safely we need someone tall with long black hair similar to Tan.
- Talk to Ivan who has an idea which person fits the description perfectly, but he is afraid of that thought.
- Go back to Lunaform, by talking to the small boat.
- Talk to Ivan at (jor_mbase 163, 295) We're meeting Wilhelm who doesn't want to join the mission. After Tan mentions the reason why Wilhelm is working there and after some convincing, he agrees to come along to infiltrate the temple for information about the ghost ship and finding people who want to escape.
- Talk to Walter Sailor (jor_mbase 161, 341) and go to the Raised Land.
- Leave the map through the top portal.
- Walk into the bushes at (jor_raise1 322, 64)
- You will be ported to another map. Talk to Tan. Nadoyo explains the plan. Wilhelm will disguise as a High Rank Priest so we can enter the restricted area of the church, in hopes to find information or people who want to escape. Wilhelm made it clear that he wants to find one person and that's the only reason why he is doing it. Nadoyo mentions that the high priest we disguised into wants to escape from the cult too. You will be rewarded with 15x Wigner Merchant Guild Voucher (1001618) and 15 reputation.
- Enter the dungeon at (jor_raise1 152, 316)
- Enter the safe spot at (jor_tmple1 229, 266)
- Talk to Nadoyo, who explains the plan. Wilhelm will pose as high priest Carmigand, a key figure in the cult. We just have to follow him and everything should work out fine, but Wilhelm is skeptical about the plan.
- Talk to the Guard who registers our party with mostly fake names. Nadoyo will go ahead. Talk to the guard again to start the Gimli Infiltration instance. NOTE EVERYONE CAN OPEN INSTANCE FROM PARTY.
- Talk to Nadoyo who tells us that Carmigand's plan to escape got leaked. Now we need to act fast in to find and rescue him from the cult, because he has all information we need.
- Talk to Tan who teleports you into a new room.
- Talk to Wilhelm who asks the believers about Carmigand. They don't know where he is, but they tell us to look for him at the inner payer room. Wilhelm uses the time to ask about someone named Reinhard, the guy who he is looking for. After the dialog you get warped out.
- Talk to Tan at the new location.
- Talk to Tan to get warped to another prayer room.
- Talk to the Believer, who are complaining about their time at the temple. They want to escape and Wilhelm offers them the way out. But guards appear who are suspicious about the loud noises and forbid meeting in groups bigger than 2. They start attacking you.
- Kill the guards.
- Talk to the Believer again. They agree to escape, but don't know anything about Reinhard either. You get warped out.
- Talk to Tan to get the next location.
- Talk to the guard who is surprised to see Carmigand. Wilhelm, who pretends to be Carmigand, uses this time to surprise attack the guards.
- Kill the guards.
- Enter the portal, which appears after killing both guards.
- Talk to the Believer at the top of the room. They are happy to be rescued by us and are willing to trust us to escape. But no one knows anything about Reinhard. One of them suggests that he died from the suffering at the temple.
- You have to search for another prayer room (1@mdtem 117, 38).
- Talk to Tan. Guards will appear. They claim that Wilhelm is Carmigand and try to capture him. You have to kill both guards again.
- After killing the guards, more guards appear. Talk to the yellow guard and even more guards appear. Wilhelm suggest to be captured so they bring us to the real Carmigand. This would be more efficient than wandering around.
- You will be warped to a preacher room. Talk to Wilhelm. Carmigand will appear and you will learn that he is actually Reinhardt, the guy Wilhelm is looking for. They are brothers and their parents died. Reinhardt is happy that he has finally found him, but he is also disappointed that he became a high priest for this temple. Carmigand explains that there is a secret passage in the room, that no Rgan knows about and we need to find it to escape.
- Suspicious Places will appear. Click on all of them, until you hit the right one and get warped out.
- Talk to Wilhelm, who is confused why the passage is like a mace. Carmigand explains that each prayer room is connected to the mace and we need to find the right one to escape.
- Two guards appear and want to re-capture Carmigand and Wilhelm. Kill both of them. After Killing the guards talk to Wilhelm again, who teleports you to a new place.
- Talk to Tan. Wilhelm finds it funny that he, who was weaker as a kid is now protecting his brother.
- 4 Guards will appear to capture us. Kill them.
- Talk to Tan again. Carmigand doesn't know where the exit is exactly. You get ported to a new location
- Talk to Wilhelm. Hyasagand appears with guards and explains that she is happy to see Carmigand's downfall. Carmigand tells her what he thinks of the church and how big of a lie it is. She sends the guard to capture him, even with force.
- Kill the 3 guards that Hyasagand sends out to capture Carmigand.
- Talk to Wilhelm. Believers witness what happens and Hyasagand twists the words to make Carmigand look like the bad guy. Kill all 9 guards in order to progress.
- Talk to Tan. Ivan and the others appear with believers to escape. Hyasagand retreats for now. Carmigand makes a speech to his people to follow him, even when he caused a lot of pain. A portal will appear, enter it to leave the instance.
- You will be warped back to the safe spot. Enter the bushes. You will meet Nadoyo and the others inside. Ivan explains what happened inside of the temple and Nadoyo is not surprised that it turned out this way. Carmigand promises to her that he will not make the same mistake twice. You will be rewarded with 20x Wigner Merchant Guild Voucher (1001618) and 20 reputation.
- Go back to Lunaforma and talk to Tris (jor_mbase 149, 270) He greets all the newly escaped people from the cult. They are a bit unsure of the place, but Tris makes a clear speech about the place and it's purpose. The old believers wish for justice over Carmigand's betrayal, so Tris decides to speak in private while Ivan shows them the lands here.
- Go back to the center barracks (jor_mbase 203, 190) Enter the portal.
- Go straight up into the portal at the top.
- Talk to Wilhelm. They clear up why they brought Carmigand up here. He wishes to be called by his old name, Reinhard Lugenburg. He is willing to give us any information needed to defeat the cult.
- Talk to Reinhardt. He tells us about the Ghost Ship, which fits everything we know so far. He also mentions that the cult uses a new route in fear of the ship. We also learn, that the cult has weakened over time because of the humans leaving, but we don't know anything about their main force. Because Reinhard is human, he did not get all the information. You will be rewarded with 30x 1001618.png Wigner Merchant Guild Voucher (1001618) and 30 reputation.
- Talk to Wilhelm. He starts explaining about how their parents died and begins to rant about how Reinhard betrayed their family by becoming something they are fighting against.
- Talk to Reinhardt, who explains that he wanted to help everyone, believing the church was the answer. Wilhelm leaves disappointed , even saying that he buried his feelings for his brother because of what he did.

- Unlocks Side Quest
- Lugenburg Brothers.
- Enter the building at (jor_albe 120, 146)
- Talk to Maristella Walter. She asks you to meet her at the harbor for the journey to the ship, now knowing the location where to find it.
- Leave the building and go to (jor_albe 191, 180).
- Talk to Maristella Walter. Enter the Ghost Ship instance.
- Talk to Maristella inside. It is planned to move with caution and check if it's really the ship of the Walter.
- Walk left, kill the ghost ship crew and a Sternlight will appear. It feels familiar, but it's not the same as the one Maria remembers.
- Walk right and click on the Mast Traces. Maria finds marks from back then, when she was younger.
- Walk up to the right side and click on the Old Box. Inside the box you find old wooden toys, which are by Howell for his daughter.
- Walk down and kill the ghost ship crew again, a portal will appear.
- Kill the ghost ship crew again and click on the Crumpled Documents which are unreadable. Even Yohan can't read whats on the papers which are smudged by the seawater. BEFORE ENTERING THE PORTAL!!
- Find the Rusty Fountain Pen at (1@wtgs 184, 121) Yohan recognizes the pen and with that it's certain what this ship is about.
- Kill the ghost ship crew on the other side.
- Follow the way till you find the Box under a Bed. (1@wtgs 149, 127). You find a journal. It says, that after Maria escaped a strange woman appeared on the deck, who granted a wish to the captain. When the captain answered everything on the ship changed; memories were fading and crew members turned into monsters. Now we know, that this is the ship Maria was looking for.
- Search for the rest of the ghost ship Crew and kill them.
- After killing them all, a portal will appear at (1@wtgs 109, 114). Before entering Maria gives a short speech confirming that this ship is the missing Walter and that every answer must lie in the Captains Quarter.
- Upstairs you will meet the Ghostship Captain.
- Talk to him to start the fight after Maria gives a speech to bolster morale.
- Talk to him after his death. He will turn into human form for a while to explain what happened in the past. His wish was to sink every cult ship, even in death. He is glad that he could at least see everyone one last time before dying.
- Leave the room on the right side (1@wtgs 331, 27).
- Outside of the ship talk to Maristella. She summarizes what happened and that they need to leave before the ship disappears.
- Leave the instance through the portal, which appears next to Maristella.
- Talk to Maristella Walter who reports to Megas what happened on the ghost ship.
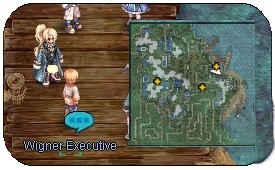
- Wigner Executive will appear, talk to him. He tells you that he has the goods Heine sent us. Now that we're done, we should return to Lunaforma and speak to the tablet again. You will be rewarded with 70x Wigner Merchant Guild Voucher (1001618) and 90 reputation.
- Unlocks Mysterious Ghost Ship daily instance.
- Go back to the center barracks (jor_mbase 203, 190). Enter the portal.
- Talk to Tris. He asks us about what happened on the ghost ship. After some time he tries to call Heine again, but the connection to him is bad. Speak to him again, the connection is stable now. The entire tablet needs an overhaul and Heine wants us to help him with that. Tris made a spare room ready for us and we should head there with the tablet ASAP.
- Go upstairs and into the first portal on the left side. Talk to Heine's Tablet (mbase_in 71, 126).
- Speak to the tablet. Heine tells you that the connection is really stable. Choose the second option: "I'll do as you order." and he tells you to get materials for maintenance.You have to farm 2x
 Vellelopy (1001643) . Vellelopy drops from Velelling (22315) in jor_raise1.
- Note: If you already have the Vellelopy, skip to step 166
- Talk to Walter Sailor (jor_mbase 161, 341) and go to the Raised Land.
- Leave the map through the top portal. You can find the Velellings here.
- Go back to the center barracks (jor_mbase 203, 190) Enter the portal.
- Go upstairs and into the first portal on the left side to deliver the Vellelopies to Heine's Tablet (mbase_in 71, 126)
- Talk to the tablet. It will begin to absorb the materials you brought along. While waiting, Heine asks to tell an old story, you Choose "Please tell me. " and he explains us why he began helping Tan and Tris but then starts ranting about them as well!
- Talk to the tablet again and Heine complains about how annoying it is that it didn't work the first time. After we ask ( choose "How old is it?") he tries to explains how old this tablet is. He also mentions that he added 2 new features to the tablet as well.
- Talk a third time with the tablet. Heine is happy that it works for the second time, so you ask and choose "Is that good?", and he starts to complain that it's bad that it's only working for the second time. But then he points out that we're from the future by reading our mana, so he asks us why we came. Choose "To completely eliminate the Rgans" and we explain what happened in our time and that the Rgans are a really big problem. Heine is happy about our answer and wants to help us. You will get 1x
 Heine's Tablet (1001627) .
 - Exit the room and talk to Tris. Tris plans to attack the cult with the information Aurelie provided. After more information from Heine all agree to attack ASAP to end the war before the cult can regroup, but something happened outside. You will be rewarded with 50x Wigner Merchant Guild Voucher (1001618) and 50 reputation.
- Exit the barracks through the portal and talk to Nadoyo. He explains that the cult plans to resurrect Jormungandr! Nadoyo even saw the shadow of a Serpent, so we need to contact our allies and gather all the information we can get.
- Gather 3 reports:
- Wounded Soldier (jor_mbase 62, 194)
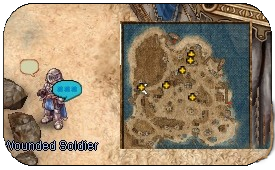
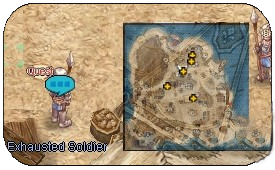
- Exhausted Soldier (jor_mbase 186, 250)
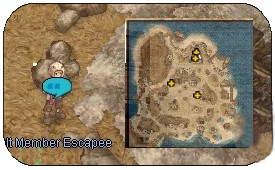
- Cult Member Escapee (jor_mbase 216, 297)
- Go back to Tris who is in front of the center barracks (jor_mbase 203, 186). We give him all information we gathered. But Tan and Nadoyo are missing so we need to check on them!
- Talk to Walter Sailor (jor_mbase 161, 341) and go to the Raised Land.
- Leave the map through the top portal.
- At (jor_raise1 198, 189) you will find a Rock Crevice, enter it.
- Inside talk to Nadoyo. They prepared for something inside the church, a room even Reinhard didn't know. So before going back to Tris we are going with them into the church to check it out and to find more evidence of the giant serpent.
- Check the Decorative Door at (jor_raise1 128, 323)
- Inside the building talk to the Cult Priest. The Priest confirms our fear, something eats people by absorbing their mana to get stronger and stronger. Tan and Reinhard want to go ahead and deal with it while we and Nadoyo go back and report to Tris.
- Talk to Nadoyo, she will warp you back to Lunaphoma.
- Go back to Tris who is in front of the center barracks (jor_mbase 203, 186) We report back with what happened and what Tan's plan is. Tris will exclude normal soldiers and us from the battle and we should unite back with our friends on the 2nd floor.
- Enter the barracks and go into the Small Door.
- Talk to Nyar. Heine explains that we can't erase events from the past but that we could join Tris in the battle with Heine's help. You will be rewarded with 10x Wigner Merchant Guild Voucher (1001618) and 50 reputation.
- Talk to Walter Sailor (jor_mbase 161, 341) and go to the Raised Land.
- Leave the map through the top portal.
- You have to enter the Decorative Door at (jor_raise1 128, 323) again.
- Talk to Nadoyo. Tris and Nadoyo are surprised to see you here, but Heine stops him and explains that he needs help and only we can do that.
- Talk to the door.
- Talk to the Heine Tablet. Everyone is gathered here and some are unsure if this is the right call. After a vote it's decided to proceed and Heine wants to share his new spell with everyone
- You will start the instance "Final Battle".
- Inside choose "Use the tablet" and Heine tries to find every location.
- Enjoy the dialogues ~
- After everyone has channeled their mana into the egg, click on the big egg
- Kill Corrupted Tan. After a long battle the Serpent tries to convince Tris to save his life while Tan shouts to finish it. Tris finishes the Serpent off and Tan dies with him....
- Talk to Nyar. Heine suggests to leave first to track down the cult's movement and give Tris some time to gather his thoughts. You will be rewarded with 90x Wigner Merchant Guild Voucher (1001618) and 110 reputation.
- Outside the instance talk to Nyar again who brings us to a new area.
- Note: If you fail the instance or accidently teleport away use this navilink to get back here: (jor_tmple1 170, 307) Talk to the Decorative Door to enter.
- You will be warped, talk to Nyar again. Nillem and Lehar find a suspicious room with a book. Nillen reminds us why we are here and that we should investigate by using this book first.
- Click on the Suspicious Book to start the Instance Secret Altar.
- A shining door will appear, enter it.
- Inside talk to Lehar. Nillem explains that ahead is a big power and with the death of the giant serpent they start their next plan of concentrating their remaining power into Lasgand. You need to kill all monsters.
- At the end of the corridor there will be a Door, click on it.
- Talk to Lehar. This place looks familiar, like the place where the High Rank Rgans live. You continue the way.
- Follow the way and kill all Cult Priests.
- Talk to Jormungandr Shaman, who is cursing everyone who was part of the battle, like it is told in the stories back then. Kill him and click on the door to continue.
- Walk into the Cult Shaman, who explains that with the curse they will persist eternally. Monster are spawning, kill all big Serpents.
- Click on the Giant Egg. Tris transfers the curse onto himself. Aurelie and Tris will watch over the egg until it's withered away and Tris children in the future will fight back what ever hatches there. You will get ported back to the island. You will be rewarded with 60x Wigner Merchant Guild Voucher (1001618) and 50 reputation.
- Outside talk to Nyar. Talk about what happened, now that Nyar reclaimed some of his power, Lasgand should be weakened by a lot now. But before we go, we need to swap the tablet with something on the docks, that Heine hid for us.
- Go back to Lunaforma by talking to the small boat.
- Talk to the Bushes to receive a new Heine Tablet. Heine says his goodbye and warps us back to the island.
- Talk to Nyar again and choose to return to our own time.
- Walk to (jor_crk 137, 138) Aurelie already senses the sudden change in magic and we report what happened. Now Nillen and Nyar will seal the rift while we'll go and see what happened to Lasgand in the Seal.
- Talk to Nyar Clone. Lehar and his aunt will go on to lift the curse from Lasgand. You can't join them, so you need to wait until they are done. You have to wait 10 minutes to open the instance. Grab a coffee, visit the toilet, touch some grass. After the 10 minutes Lehar and Voglinde will re-appear, telling us that the curse is broken but Lasgand is still resurrecting. Now we think it's the work of the Heart Piece of Ymir and we need to check it out, remembering what happened in Bio Labs back then.
- Open the instance.
- Inside the instance talk to Aurelie. The insane power of Lasgand that was there before is gone now, but the mana is going wild. We need to confirm who this Lasgand is.
- Talk to Lasgand who is acting weird for some reason. You need to kill him multiple times.
- Talk to Aurelie who confirms that this Lasgand is acting the same as the first time and it is really the Heart Piece of Ymir. She will warp you out of the instance.
- Talk to Nyar Clone. We confirm what he is still dangerous and his power is still creating new Rgans. The curse is lifted but Lehar and Voglinde are staying to fight back the Rgan. Now Nillem wants to see us where the rift was, you get warped there.
- Talk to Nyar. Nillem and Nyar failed to seal the rift. The time is now repeating itself over and over, but we're free to travel there from time to time. Not only that, but now YOUR name is mentioned in the history books as well. You will be rewarded with 70x Wigner Merchant Guild Voucher (1001618) and 60 reputation.


Side Quests
Supply Procurement
- By talking to Mandel at (jor_mbase 210, 173) you can unlock the dailys for the Supply Procurement.
Lugenburg Brothers
- Talk to Reinhardt inside center Barracks at (mbase_in 118, 186). Join the portal straight ahead.
- Outside Tris is waiting at (jor_mbase 197, 277)
- Talk to Reinhardt next to him.
- Talk to Wilhelm.
- Talk once more Tris. You will be rewarded with 10x Wigner Merchant Guild Voucher (1001618) and 5 reputation.
- You have now access to "Clear Rising Lands" - hunting quests.
Insufficient Food (Herb Gathering/Fishing)
- Talk to Volunteer Vallen Wok at (jor_mbase 211, 280)
- He will ask for 10 of the same herb or 10 of the same fish, which spawn over the whole map.
- If you got the herb request, bring 10x
 Wide Grass (1001625) . He won't accept
  Long Grass (1001624) .
 - If you got the fish request, bring 10x
 Lunaforma Shrimp (1001619) or 10x
  Lunaforma Calamari (1001620) or 10x
  Lunaforma Seaweed (1001621) or 10x
  Lunaforma Fish (1001622) . He won't accept
  Lunaforma Oyster (1001623)
Mercenary Tasks
- Talk to Valdaris (mbase_in 302, 123)
- Talk to Mercenary Member (jor_mbase 300, 151)
- Talk to Mercenary Member (jor_mbase 198, 251)
- Talk to Mercenary Member (jor_mbase 133, 128)
- Talk to Mercenary Member (jor_mbase 248, 103)
- Talk to Valdaris (mbase_in 302, 123)
- You will get 10x Wigner Merchant Guild Voucher (1001618) and 5 reputation.
- You have now access to the daily quests of mercenary tasks.
Daily Quests
| NPC | Quest | Reward | Reputation |
|---|---|---|---|
| Mandel at (jor_mbase 210, 173) | Gaebolg: Collect 10x |
1x Supply Procurement daily! |
Increase Reputation of the chosen family by 100 |
| Nerius: Collect 10x | |||
| Heine: Collect 10x | |||
| Lugenburg: Collect 10x | |||
| Walter: Collect 10x | |||
| Wigner: Collect 10x | |||
| Richard: Collect 10x | |||
| Wilhelm at (jor_mbase 140, 201) | Hunt 300x monsters in Northern Rising Lands. | 10 with Gaebolg family | |
| Hunt 300x monsters in Southern Rising Lands. | |||
| Valdaris at (mbase_in 302, 123) | Any kind of help: Recruit the right Mercenaries for Valdaris. Not everyone is suitable. | 2 with Gaebolg family | |
| Fresh food: Collect 10x |
5 with Gaebolg family | ||
| Clamshell for injuries: Hunt 50x Scalleg | 5 with Gaebolg family | ||
| For the children: Hunt 50x Velelling | 5 with Gaebolg family | ||
| Clean Finish (1): Hunt 300x monsters in Jormungandr Temple first floor (jor_raise1 116, 334) | 10 with Gaebolg family | ||
| Clean Finish (2): Hunt 300x monsters in Jormungandr Temple second floor (jor_raise1 116, 334) | 10 with Gaebolg family | ||
| Heine Tablet at (mbase_in 21, 168) | Collect 3x |
3 with Gaebolg family | |
| Counselor Wool at (jor_albe 160, 137) | Talk to him, go to next npc at (jor_albe 50, 241), return to Wool. | 2 with Gaebolg family | |
| Libra at (jor_base 314, 137) | Deliver 1x |
2 with Gaebolg family |
Family Reputation
We have a total of 7 family reputations to complete. The maximum reputation you can reach is 1,000 per family. The Gaebolg reputation is partially filled through the main quest, while the other families need to be completed with Mandel's daily quest. After reaching 1,000 reputation with a family, you can pay 5 ![]() Wigner Merchant Guild Voucher (1001618) to Mandel to receive a 1-hour buff of your choice.
Wigner Merchant Guild Voucher (1001618) to Mandel to receive a 1-hour buff of your choice.
Note: Buffs stack, but you lose all buffs upon death.
| Family | Buff |
|---|---|
| Gaebolg Blessing | Increase ATK and MATK% by 10%. |
| Nerius Blessing | Decreased Variable Cast Time by 10% and increase attack speed by 10%. |
| Heine Blessing | Increase damage to Dragon and Plant enemies by 15%. |
| Lugenburg Blessing | Increase damage to Demon and Undead enemies by 15%. |
| Walter Blessing | Increase damage to Formless and Fish enemies by 15%. |
| Wigner Blessing | Increase damage to Brute and Angel enemies by 15%. |
| Richard Blessing | Increase damage to Demihuman and Insect enemies by 15%. |
Note: After reaching 1k reputation with all families, you will be able to start the Final Battle Instance on hard mode, as well as buy the +11 Gaebolg Refine Hammer.
Fields/Dungeons
| Map | Monster | |||
|---|---|---|---|---|
Northern Rising Landsjor_raise1
|
 Seawind (22313) |
 Velelling (22315) |
 Rockstriker (22317) |
 Yoster Collector (22325) |
 Scalleg (22314) |
 Letterster (22316) |
 Yoster Cleaner (22323) |
 Yoster Cooker (22327) | |
Southern Rising Landsjor_raise2
|
Seawind (22313) |
 Skipskipper (22319) |
MVP Icehorn (22362) | |
 Ice Seahorse (22318) |
 Cliolima (22320) |
|||
Jornvillejor_base
|
Seawind (22313) |
 Yorker Religious Worker (22322) |
||
 Yorker Worker (22321) |
 Yoster Fixer (22324) |
 Yoster Negotiator (22326) |
||
Jormungand Church Temple F1jor_tmple1
|
Yoster Cleaner (22323) |
Yoster Collector (22325) |
Yoster Cooker (22327) |
 Yormi Missionary (22354) |
Yoster Fixer (22324) |
Yoster Negotiator (22326) |
 Yormi (22353) |
 Yordos Investigator (22355) | |
 Yordos Judge (22356) |
 Yordos Executor (22357) |
MVP Yortus Arbiter (22363) | ||
Jormungand Church Temple F2jor_tmple2
|
Yordos Investigator (22355) |
Yordos Executor (22357) |
 Yoscopus Sorcerer (22359) |
 Yortus Conjurator (22361) |
Yordos Judge (22356) |
 Yoscopus Guardian (22358) |
 Yortus Bishop (22360) |
MVP Yortus Bailiff (22364) | |
Instances
Enchant NPCs
To enchant Gaebolg gear, talk to Mage Lobelia at (mbase_in 228, 129).

To transform gaebolg gear into yorscalp gear, also to enchant yorscalp gear, talk to Blacksmith Sansan at (mbase_in 230, 125).

Armor Enchants
| Target Items | Slot Order | Minimum Requirements | Line Options | Reset Process | |
|---|---|---|---|---|---|
| Grade | Refine | ||||
| 3→2→1 | No Grade | 0 | allowed | No Reset | |
| 3→2→1 | No Grade | 0 | allowed | No Reset | |
| 3→2→1 | No Grade | 0 | allowed | No Reset | |
| 3→2→1 | No Grade | 0 | allowed | No Reset | |
Perfect Enchant Slot 1
| Slot 1 Enchant | Description | Materials | Zeny |
|---|---|---|---|
|
|
Atk +2% ________________________
Refine Level +7: ________________________
Refine Level +9: ________________________
Refine Level +11: ________________________
[Bonus by Grade] ________________________
[Grade C]: ________________________
[Grade B]: ________________________
[Grade A]: ________________________
Type: Enchant |
40x |
3,000,000z |
|
Matk +2% ________________________
Refine Level +7: ________________________
Refine Level +9: ________________________
Refine Level +11: ________________________
[Bonus by Grade] ________________________
[Grade C]: ________________________
[Grade B]: ________________________
[Grade A]: ________________________
Type: Enchant |
40x |
3,000,000z | |
|
Decreases After Skill Delay by 3%. ________________________
Refine Level +7: ________________________
Refine Level +9: ________________________
Refine Level +11: ________________________
Type: Enchant |
40x |
3,000,000z |
Perfect Enchant Slot 2
| Slot 2 Enchant | Description | Materials | Zeny |
|---|---|---|---|
|
|
Increases Attack Speed (decreases After Attack Delay by 5%). ________________________
Refine Level +7: ________________________
Refine Level +9: ________________________
Refine Level +11: ________________________
Type: Enchant |
30x |
2,000,000z |
|
File:313084.png Forest Magic Orb (Caster) (313084) |
Reduces Variable Casting Time by 5%. ________________________
Refine Level +7: ________________________
Refine Level +9: ________________________
Refine Level +11: ________________________
Type: Enchant |
30x |
2,000,000z |